Wingspan – 970 mm 38.1 inches
Length - 700 mm 27.6 inches
AUW - 860 grams 30.3 ozs with a 1500mah LiPo
Drive - 1400Kv 14A motor with a 9 x 3.8 SF prop.
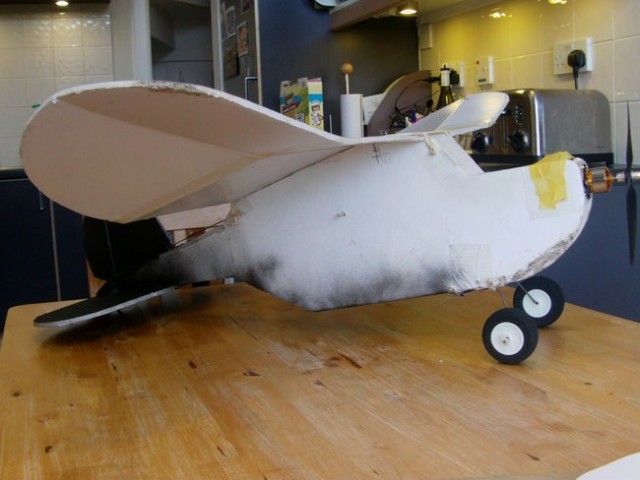
When I first built the Old Fogey it flew great. There was a bit of a wallowing problem, but some extra nose–weight adjustment helped (that's the pile of coins under the yellow tape) and my final CG seemed to be forward from the one in the design.
However as the plane aged the wallowing gradually got worse and I just couldn't get it to fly right. It had done it's job though, getting me through a lot of early flying. As soon as I moved–on to other planes I lost interest in the Old Fogey and put it aside. As my knowledge and experience of RC planes expanded it always annoyed me that I couldn't get the Old Fogey flying right.
I did some research on the Internet, looking to see if anyone else had come across this wallowing problem – specifically with the Old Fogey (which many had) and then more generally with other planes. From what I gathered, it seemed that a good way to combat the problem was to make the vertical stabiliser bigger to help dampen the oscillation.
I had a look at my Old Fogey and thought maybe there's another way to do it… maybe if I could get a bit more airflow on the existing stabiliser that would help. After all, it is tucked–in behind a pretty big fuselage.
Now this solution is a bit drastic! Those of a sensitive nature should look away now.

Basically I shifted the tail up about 70mm. I was too quick to get a 'before' image, but you'll recognise the outline of the original Old Fogey in this mock–up. The method I used involved shortening the fuselage by 20mm – which is why there's a gap there in the photograph.
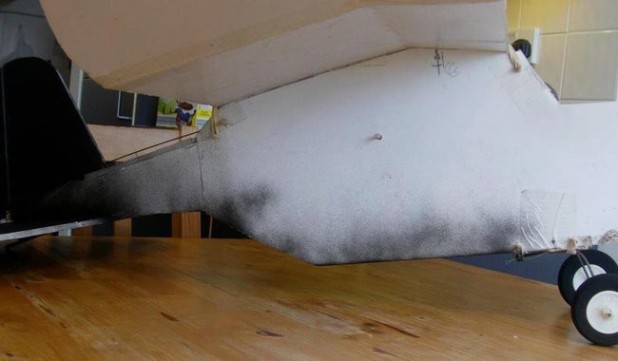
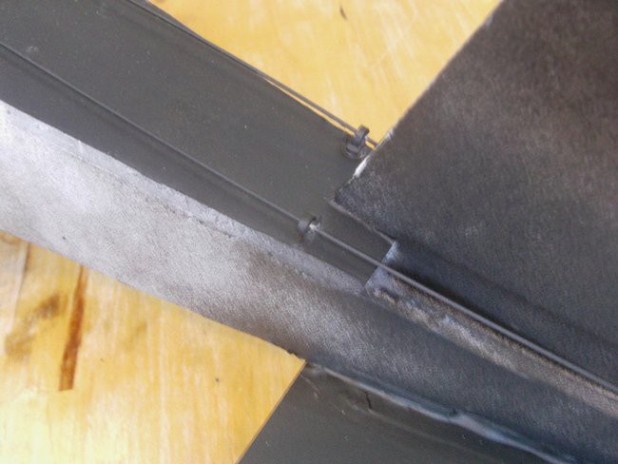
Here's the after. The tail has been shifted up and forward, and then reattached to the main fuselage.
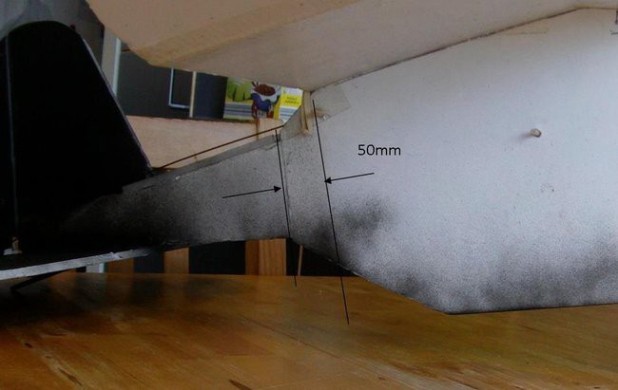
I made the first vertical cut about 50mm back from the rear wing mounting skewers…
…I made a second cut parallel to the first and 20mm further back. Here's the cunning bit! I did NOT cut through the fuselage base. After removing the two side strips I worked forward on the fuselage, cutting through the glue join to free the next 120mm of fuselage base from the sides.
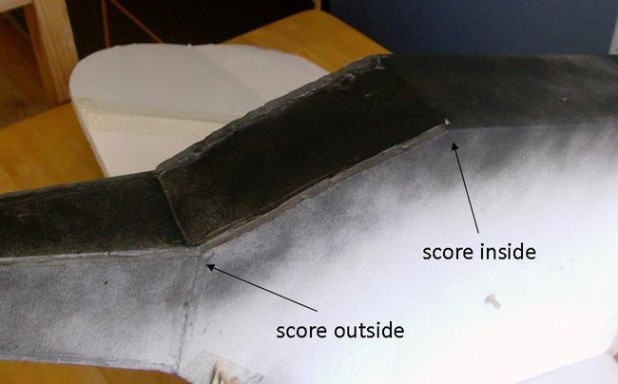
I then made two folding scores on the fuselage base – one score on the INSIDE of the fuselage at the end of the cuts I'd just made, and one on the OUTSIDE where the fuselage base projects from the tail. When these two bends are made at the same time, the tail ‘hinges' up – rising and moving in to meet the main part of the fuselage.

Because the original cuts were straight, parallel and the same width apart – when the tail connects its alignment remains the same. Take care during the re–gluing to get it in the right place. Make this job easier by gluing one side at a time – as you glue the second side you can adjust up and down a little to get things just right.
Following the new 'sporty' line of the fuselage base, trim away the excess sides. Now re–glue the sides to the base.
For added strength I put a plate on top of the tail. First I removed the curve, marking–on and making a straight cut from the tail to meet the old fuselage line just behind the rear skewers.
I then made–up a strengthening panel – making it long enough to overlap the tail, where I added a little slot in the centre to help keep the tail vertical…
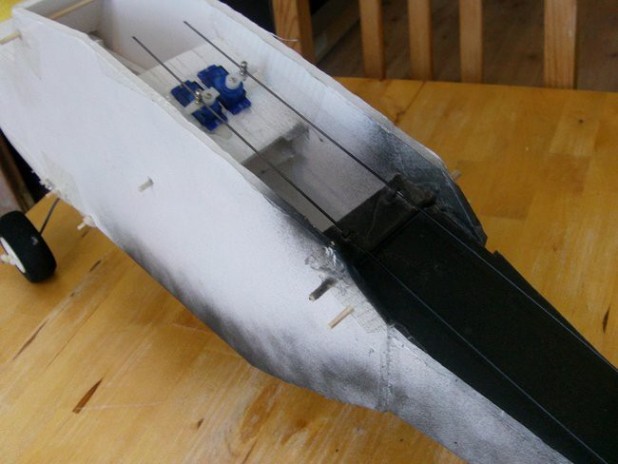
…and long enough at the front to extend under the wing to give a strong connection to the main fuselage. The last part of the pad needs to step–in so that it fits between the sides. I re–led the control rods, running them over the new panel.

My servos are on a higher mount (long story), yours will be ‘as original' and you can poke/run the control rods over, through or under the new panel.
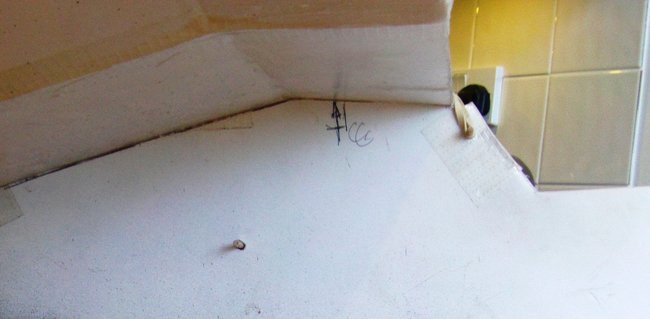
I checked my balance – purposely making the plane nose–heavy on the ‘plan' CG. Neutral CG for me is about 10–15mm forward from the under–camber fold.
Here's my Old Fogey back in the air. For me there's a significant improvement in this plane's behaviour. The roll is almost completely gone, and when it does happen (due to wind gusts) it settles very quickly. This was a moderately windy day – low down near the ground it was gusty due to the wind 'rolling' over the tops of tall trees near where I was flying. Higher up, where the wind was more uniform, the plane appeared very stable.
After the flight I increased the motor power to a 14A motor (roughly 150W). This should give me a better climb rate and more consistent speed. It also allowed me to remove all my coin ballast. In this format the plane proved very resilient and a great flyer in fresher breezes. Here's some video of those flights;
Since making these modifications I have discovered other relevant factors. My Old Fogey is a LOT heavier than the Flite Test version, which means it needs to fly faster to stay in the air. Unfortunately this does not go well with the high Angle of Incidence that the Old Fogey has, which is better suited to very slow–flying planes.
Just now I'm combating the nosing–up and wing–waving tendency by making the plane very nose–heavy, which is good for stronger winds, but not very efficient as I lose–out with slower flying. A way to combat this nosing–up tendency is to introduce more down thrust by significantly increasing the thrust–angle of the motor. At slower speeds the thrust angling has less effect and allows the wing to produce the lift required to keep the plane in the air, at higher speeds it combats the increased lift, keeping the plane flying closer to level. With these undercamber wings, it's worth visualising the wing as having a permanently deployed flap. If you've used flaps you'll know how they influence the plane, usually causing it to nose–up if they are deployed when the plane is flying faster than it should be, and often requiring a mix of down elevator even when flying at slower speeds.
(26/07/16) As an addendum to this article, I have recently explored ways to extend the Old Fogey's flight envelope by reducing the Angle of Incidence. This solution worked very well with both my original Smash Drone, and my Frankenplane2 adaptation of the Smash Drone. I first reduced the Angle of Incidence, which made a small difference, but I then modified that design by raising the tail. The final results were excellent, improving both flight characteristics and flying times. See how I did it in my Furious Fogey article.