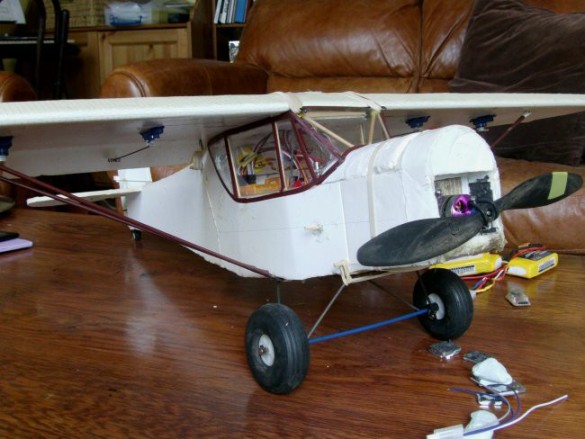
...or what happened to the 1927 Velie Monocoupe.
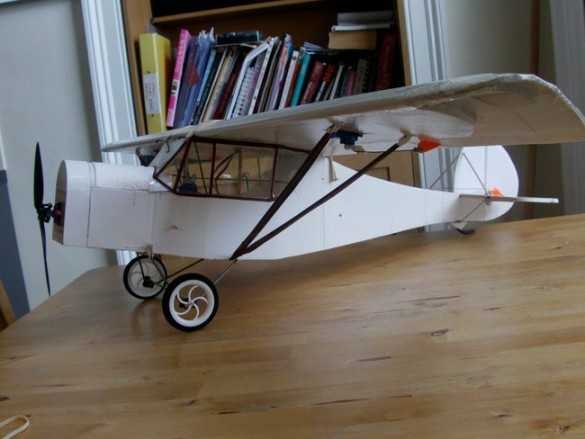
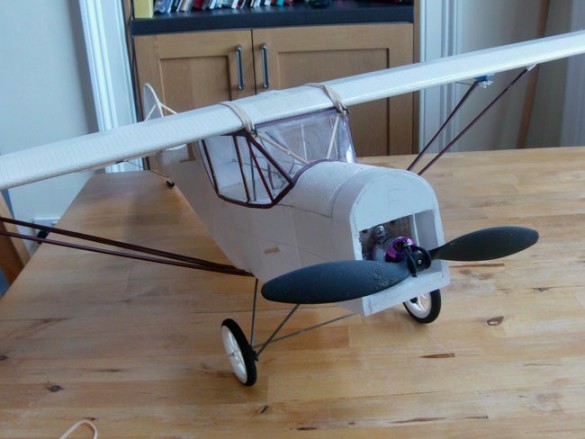
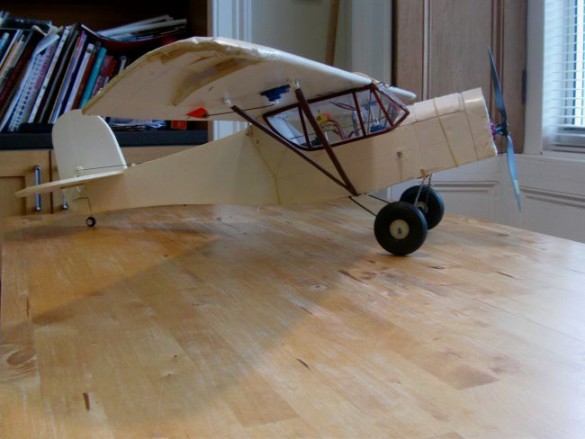
Here's how it looks now, but first it went through a series of evolutions.
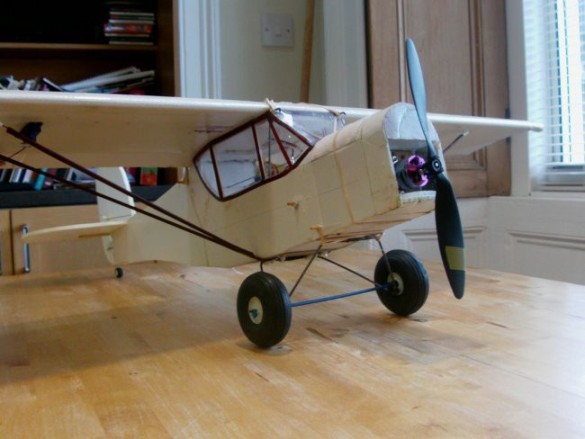
Wingspan – 1000 mm 39 inches.
Length – 680 mm 26.5 inches.
AUW – 1080 grams 38 ozs with 2 x 1000mah LiPo batteries.
Drive – D2380 1000KV 21A motor with 9 x 4.7 prop.
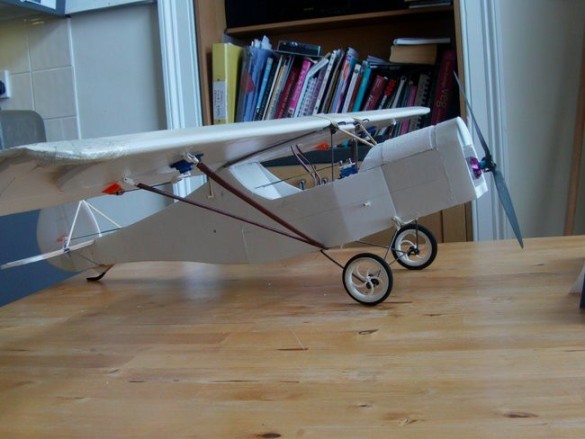
Blame it on pilot error… airframe fatigue… a dodgy receiver… anyway, my Velie Monocoupe had one too many hard–nose 'landings'. It was time for a serious rebuild. I decided to leave the tail intact and stretch the nose to give the battery and motor a greater balancing effect – this allowed me to remove a whole pile of balance weight I'd put into the plane. This weight reduction allowed the plane to be more buoyant and to fly longer on the same battery.
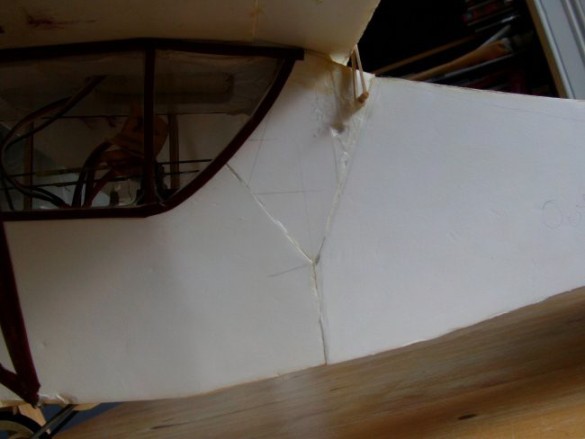
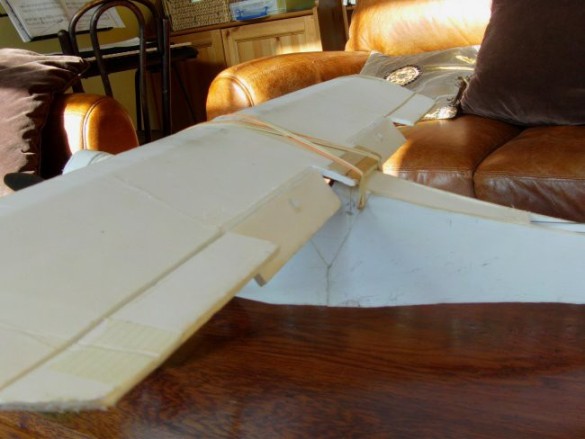
I replaced the fuselage sides from the back of the wing to the nose. You can see the angled butt–join just behind the wing struts.
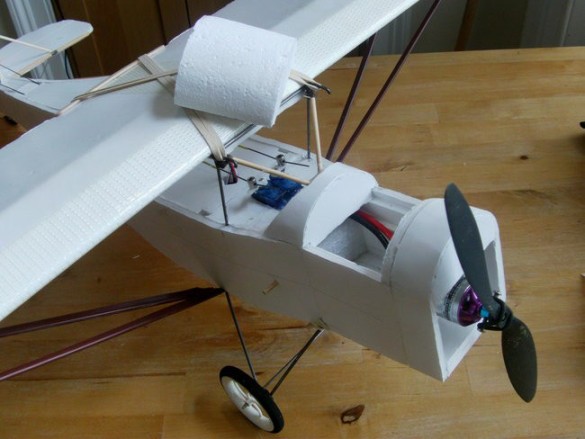
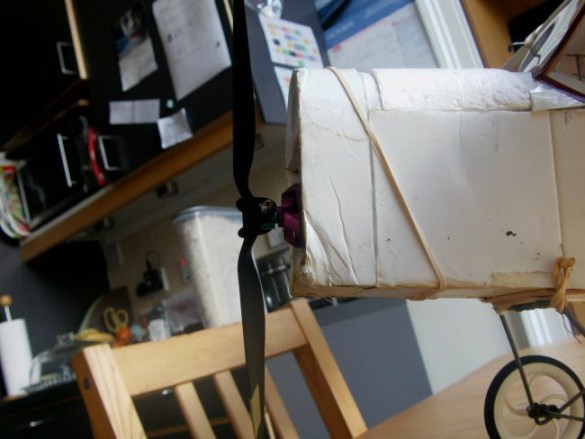
I made–up a foam hatch to allow me to load the battery inside the fuselage. The swappable pod is a tight sliding fit with a skewer to prevent forward movement.
I positioned the locating skewer so that it would 'contain' the battery and prevent it slipping backward and messing up the balance.
Inside the hatch, you can see three steps in the foam – the first is the swappable pod and the next two are the fuselage which is double thickness at this point.
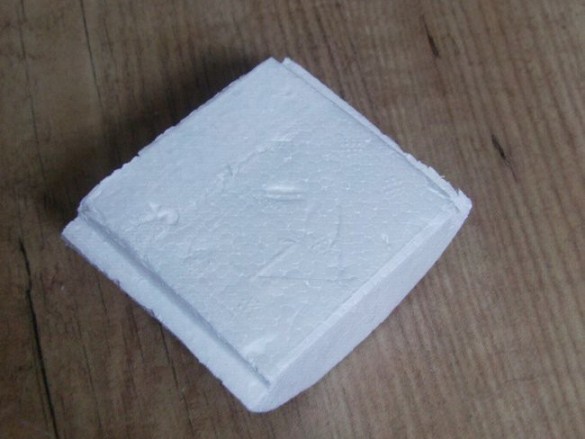
That little ledge matches this stepped cut–out in the hatch cover and helps keep the cover from moving sideways.
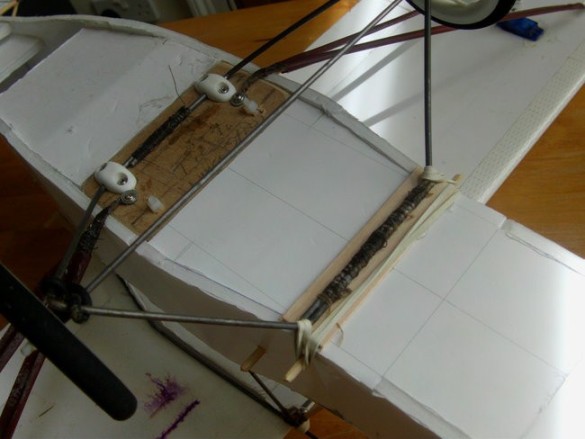
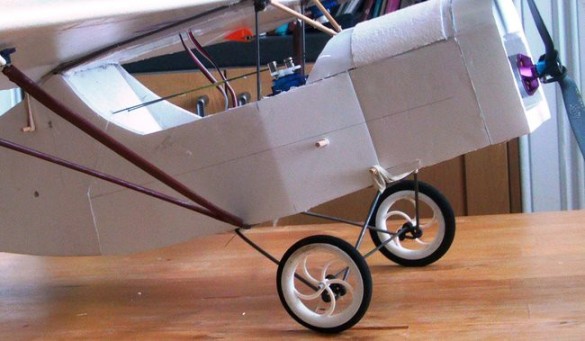
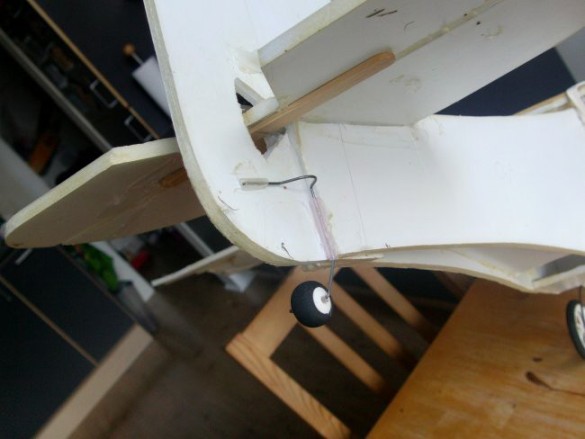
Much of the damage to the Monocoupe's nose was caused by the unforgiving way I'd fixed the front undercarriage mount to the plane. It was too rigid. Here I've used elastic with a tongue depressor pad under the wire to protect the foam. That should allow a bit of give for bumpy landings.
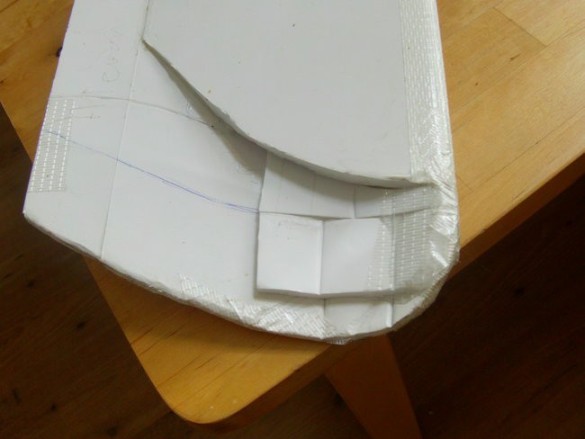
I wondered about 'clipping' the wings to get rid of the damaged ends. You can see a pen line where I intended making the cut. But then I realised it would make the ailerons pretty short. I considered extending the ailerons towards the fuselage, cutting and joining new to old, but decided it was probably easier to try a repair to the wingtips first. Some extra foam, tape, and my trusty hot glue gun did the job.
I added window detail around the cabin. I didn't want to copy the Monocoupe and decided on a chunkier 'look' to match the new nose. This is clear hard packaging plastic with pvc tape cut into thin strips for the framing.
Well, I got the plane back in the air, and it flew pretty well, but then I had a brownout and had to watch it do a good hard nose–hit, followed by a strangely mesmerising series of wingtip cartwheels. Deep breath – think calm thoughts – start the walk of shame.
Anyway, the tail got wrecked, but everything else survived. Back to the batcave!
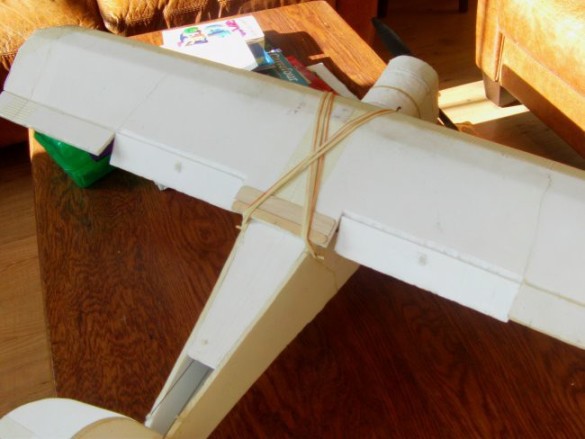
This time I replaced the whole tail section – grafting a new section onto the existing fuselage. Now all that is left of the original Monocoupe skin is the arrow–shaped bit at the top here – great stuff foam board.
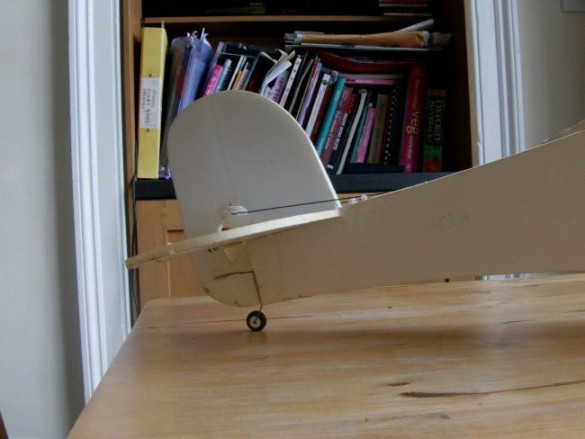
This version has larger vertical and horizontal stabilisers.
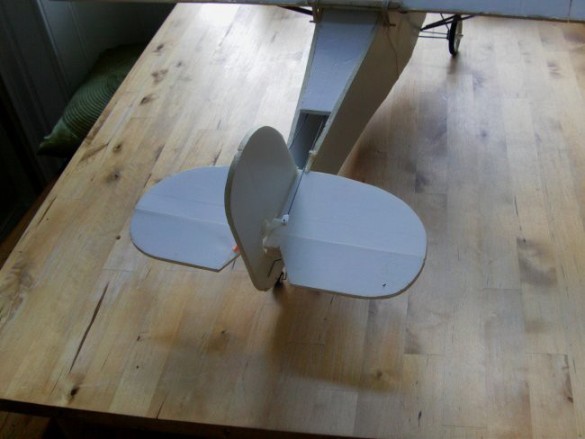
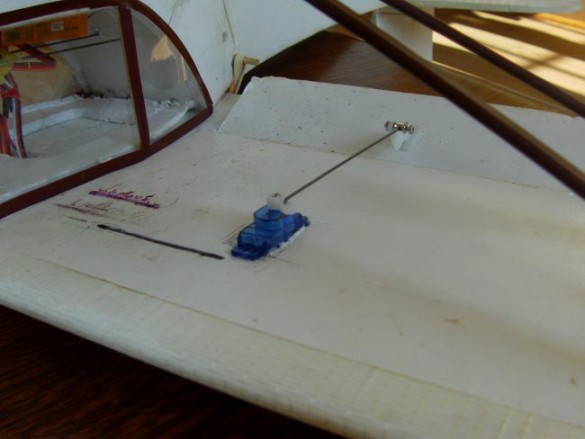
I also added tail steering using my simple tail steering system.
Now, before we move on an aside about 'brownouts'.
I'm using a second–hand Spektrum DX6i transmitter. It flies most of my models without problems – but for some reason I've had a lot of problems with the Monocoupe. I've done a fair bit of investigating and here's a list of possible causes;
Too many servos for the BEC (battery eliminator circuit). BECs are an integral part of the ESCs I use. BECs drop voltage from the 11.5V supplied by the battery to the ESC, down to an output level (5–ish volts) that the receiver and servos can handle. It does this by wasting energy and producing heat! Apparently, if I got this right, the more components it's servicing – the more energy it has to waste and the more heat it produces. If it produces too much heat the BEC circuit can fry, or, more often, the ESC senses the overheat, protects itself and shuts down (cutting power to the receiver). Another down side is that this disproportionate power use can create a high demand when all the servos are in use (+ high throttle) and drop the effective voltage – possibly causing the receiver to drop below it's operating voltage!
Or – it's a faulty ESC.
Or – it's a faulty receiver.
Or – it's a faulty motor.
Or – some receivers don't like signal reversers on the servo leads – who would have thought it!
Or – it's a timing problem with the ESC/motor combination.
Or – it's a dry solder join, or a dodgy connector somewhere.
There's probably a few more items that could go on that list, but before putting my Morphocoupe MK II back in the air I thought I had eliminated, overcome, tested, investigated and replaced etc. all these possible causes. And yes, it flew OK (in fact very nicely), for a while, but then it did it again. Brownout and nosedive!
Luckily, this time, it was mostly damaged pride, a bit more nose deformation and a broken prop.
Frustrated, I went back to the internet. Further research took me to another possible cause, and I discovered this quite by chance, the transmitter.
There's a service recall on a production series of my model and a few others – an issue with backward compatibility with some DSM2 receivers. (Guess what I use…) Described as occurring in “some rare instances” it produces exactly the kind of problem I've been experiencing. If you use DSMX receivers you'd never know there was a problem and the unit will work fine. This is not a new issue, but neither is my transmitter.
I checked my factory code and yes my transmitter was on the recall list. I filled–in the on line form and immediately Horizon Hobby arranged for a courier to uplift the transmitter at their expense. These guys have the right attitude! They know that bad press and rumours of unreliability can kill a company's reputation. Instead of sticking their heads in the sand they're meeting this problem head–on and sorting it out.
Apparently the unit tested OK, but …"for your peace of mind"… they replaced the RF board at no charge to me, and again the unit was shipped back to me at no charge. That's service!
Here's a link to the UK page; Horizon Hobby
There's bound to be other national pages for those outside the UK.
For many people this will be old news, but for us newbies it's not. I imagine there are still a fair number of older Spektrum transmitters in circulation that have not been serviced. Some will be working fine with DSMX receivers, some will be paired with DSM2 receivers that don't have the problem, some will be sitting on a shelf branded as faulty or unreliable. Some will inevitably get sold–on after years of reliable service, but then get paired with the 'wrong' receiver and start acting up. If you've been getting unexpected and puzzling brownouts with a Spektrum transmitter, it's worth checking this as a possible cause – at the very least you can eliminate it from the list.
Well, back to the Morphocoupe. Keen to get the plane back in the air I decided to use my original Hobby KingHK6S transmitter while the DX6i was off getting looked at. I've never had signal problems with the HK6S and its matching receivers, but there's no dual rates and the only control over the throws is by adjusting the mechanical linkages. After setting it all up I went for it.
It was a bit of a tense experience – amazing what a few crashes with a particular plane can do to your confidence. The good news, no brownouts – the not SO bad news, the aileron and rudder were a bit fierce for me, but the elevator was fine. A few slow, nervous circuits for the usual trimming–out and I finally started to relax. However the plane, which had flown reasonably happily 'bank–and–yank' as the Monocoupe, is now so stable it needs a little rudder input to help it into quicker turns – so that was a new dimension. I flew the plane until the low battery alarm sounded and then managed a reasonably controlled landing – ending in the inevitable last second nose–over in the grass.
My most recent mod is to change the wheels – bigger and fatter. Maybe I can stop the landing nose–overs?
Here's a flight video;
For the next major change I installed a UBEC, which uses a much more benign and energy saving method to drop the voltage down for the receiver and servos. For multiple servo situations, this works better than the built–in BEC in most speed controllers, which waste energy in the form of heat to reduce the voltage. I notice that some speed controllers are being made with SBEC's built–in. Likely this will be an ongoing trend. Above I use the term UBEC, but then I mention an SBEC. The 'S' stands for 'switching' – the circuitry grabs pulses of power from the battery, avoiding the need to 'waste' energy.
My initial understanding was that UBEC's (U standing for ultimate?) and SBEC's, both use switching to provide power, but looking at loads of adverts for ESC's I see the term UBEC used quite loosely for non–switching (linear and power wasting) BEC functions. All the external, stand–alone UBEC's I've seen DO use switching. But only ESC's with an on–board 'SBEC' definitely use power saving switching. This is confusing. Loads of times I've looked at an ESC that says it has a UBEC and thought – great, no need for an external 'SBEC', but when I check the small print, it's just a plain old 'linear' BEC that's going to heat the inside of my plane. Though, and this is the really frustrating bit, some of them with the title UBEC are actually using a switching BEC (SBEC). Usually you can spot them by noting the ferrite ring on the signal wire to the reciever.
Please, can we get some standardised descriptions! On any plane that uses more than 2 servos I now fit either an external UBEC or use an ESC with a built–in SBEC. This gives me two main benefits; at times of high servo demand (with a marginally depleted battery) I don't drop the voltage below the cut–off value for the receiver, secondly, I'm not constantly wasting battery power just warming the air!
The Morphocoupe gets flaps!
Having finally morphed into a high wing bush plane I realised the plane was missing an essential component. That's right – flaps!
It was a fairly simple addition – a couple of new flap panels cut into the wing. I added an extra tongue depressor to help strengthen the root of the wing.
Standard foam board hinges, but I reduced the bevel to the bare minimum – just enough to get a smear of hot glue onto the hinge surface. The hinges don't go beyond flush – just down.
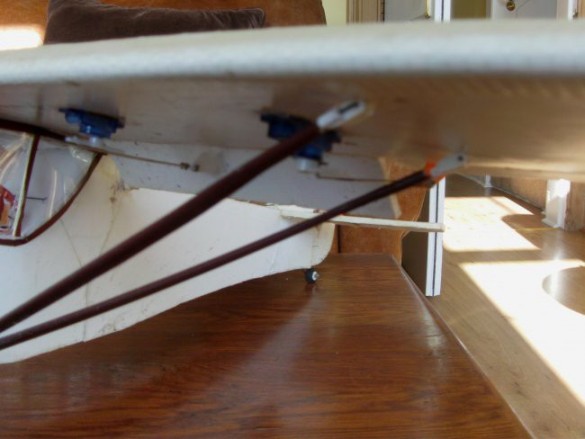
9 gram servos, control horns, linkages and adjusters supply the motion.
When I first built the wing I accidentally built–in some under camber. This meant the plane could fly quite slowly, but needed a lot of down elevator (or nose weight) to combat the lift at higher speeds. Slow was good, and worked well with the look of the plane, but it was a nuisance having to dial–in extra down elevator for faster flying – say for windier weather. As my knowledge has increased I now realise this could have also been countered by adding more down thrust.
Adding flaps has allowed me to remove that under camber. In their new 'rest' position both the flaps and the ailerons are aligned 'flush' with the underside of the wing. This gives the wing a section very similar to the Baby Blender.
Long story short;
Flaps up – the plane needs to fly a little bit faster than it did before, but with much less of a tendency to pop the nose up when power is applied. In other words it performs more predictably over a wider speed envelope. The next obvious 'tinker' is to add more downthrust and put that little bit of camber back in the wings for slower 'normal' flight.
Flaps down – the plane actually flies slower than it did before. I made a guestimate for the down elevator mix needed to combat the extra lift created by the flaps, which has turned out about right. If I do push it too hard (faster than I really should with the flaps deployed), predictably it starts to climb and needs more down elevator correction to maintain level flight.
Regarding flight characteristics, this plane only flies bank–and–yank when it's flying faster. This can be a bit disconcerting, especially if I've been flying a bank–and–yank plane just before this one. Fortunately it is very responsive to the rudder, and flat or shallow banked rudder turns are no problem. I now know this is fairly typical for this type of plane and means it flies more 'scale' or true–to–life.
Here's the plane in flight;
Can't stop tinkering!
The addition of flaps to the Morphocoupe gave me a wider flight envelope, but flight times were limited, about 6 minutes with the 1000mah batteries I favour. Plus, when the battery alarm went off I had to get the plane down fast as there wasn't much reserve in the battery. It was OK, but I began thinking about ways to get a larger battery on board.
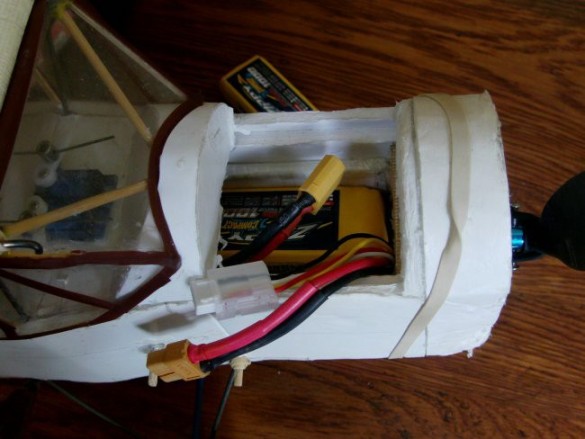
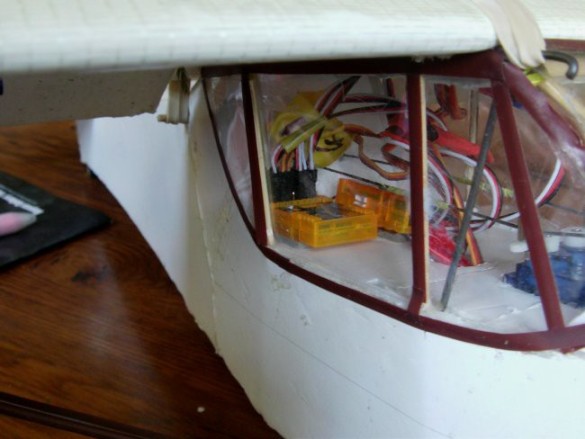
Here's the battery compartment. The single 1000mah LiPo battery is a nice fit.
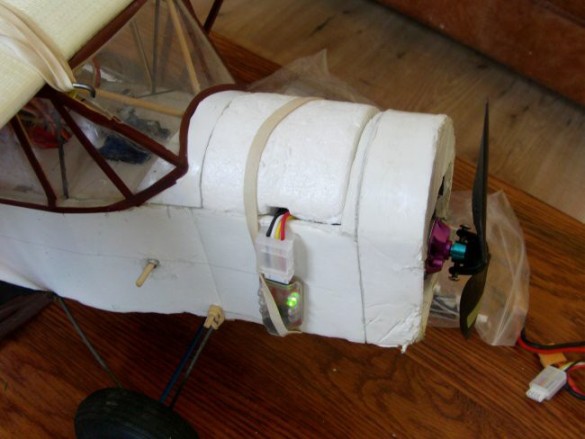
Here it is all sealed–up and ready to fly. In fact I already had the answer. I'd been flying a couple of other planes on dual battery packs running in parallel, but I didn't think there would be enough room to double–up batteries in the Morphocoupe battery compartment.
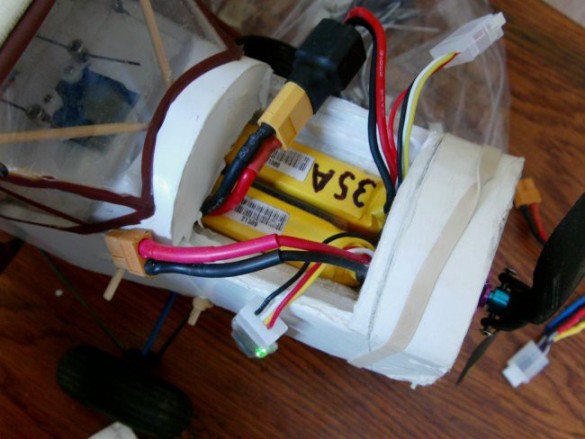
Then I had one of those; AHH–HAA! Moments – put the batteries on edge! I tried it, and the gods of small spaces must have been smiling, because 2 x 1000mah batteries fit so snugly in the battery compartment, you would think I designed it that way.
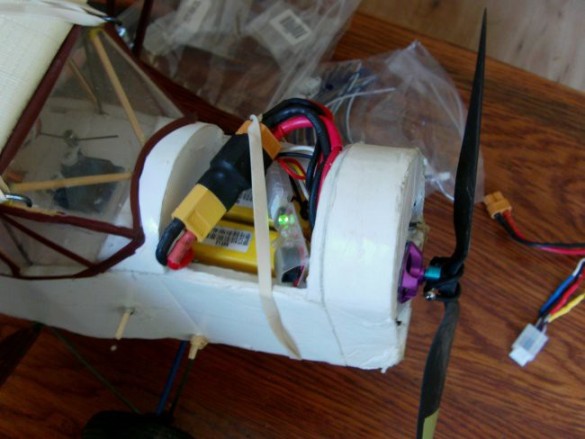
Ready to fly… OK, not very pretty once the cables are all connected, but enough to get me in the air. I can work on tidying the connectors and build a hollow lid for the battery compartment later.

The addition of an extra battery meant I could remove a pile of nose weight. Again the gods of airplane balance were smiling – I was able to remove every single bit of dead weight – 63 grams 2.2 ozs – to get the C.G. back to where it was before.
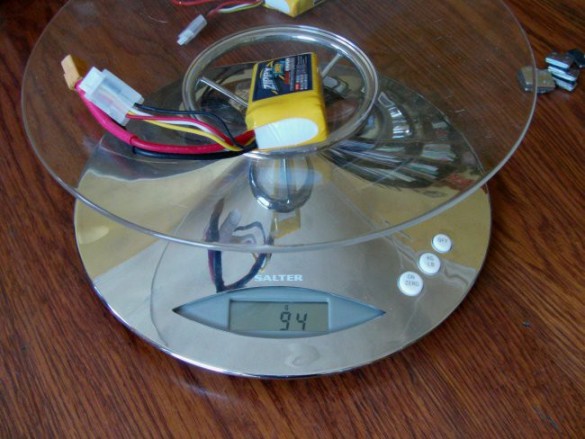
The extra battery weighs 94 grams 3.3 ozs, so for a net increase of 31 grams 1 oz I've doubled the battery capacity.
I immediately did a static test, to see what kind of flight times to expect, and came up with about 14 minutes. I was a bit sceptical that pairing the 1000mah batteries would add 2 minutes more to the expected flight time, but even if I just got the 12 minutes in the air that was more than respectable.
Tinkerer that I am, I also stuck on an Orange flight stabiliser, and mixed in a little rudder to act with the ailerons.
So how did the flight go? According to my internet weather site, winds were supposed to be around 4–6 mph but they were stronger on the field 8–10 mph with a few even stronger gusts and a bit of turbulence coming over the trees. With the addition of flight stabilisation, I reckoned the plane would have no problem, and I was right.
I got my 14 minutes in the air, and that was using aggressive throttle settings to keep the speed up for the stronger winds – no coasting around the field with the flaps down. I'm thinking I might get even longer flights in light winds. There was a lot less stress at the end of the flight too, with a good amount of time to get the plane down after the battery alarm went off. I can usually tell how the battery is doing when the alarm sounds. If I back–off the throttle and the alarm stops, it means there's a reasonable bit in reserve. If the alarm keeps sounding it's definitely time to land.
In theory these batteries can push–out 35A which was fine for the (max) 21 amp motor, but running in parallel the theoretical output is 70A. Bottom line, the batteries are 'coasting' compared to how they were being used before. This probably accounts for the longer than expected flight times.