Alistair Potter's RC plane tips.
Baby Blender Cabane Conversion
Back to planes list. Back to homepage.
This modification would work best with a new build, but it could work as a retrofit if you were willing to replace the front turtledeck.
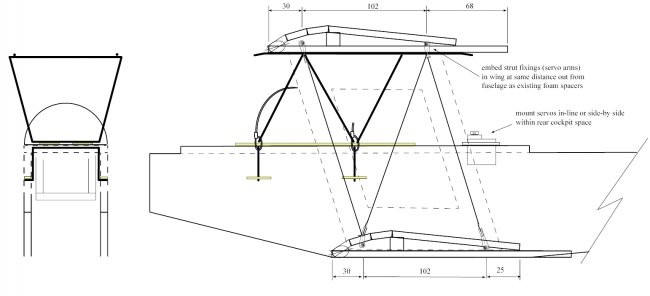
As a retrofit project, the interplane strut mounts on the wings could be long control horns fitted through a slit passing right through the wing. You'd see the flat base of the horn on the wing, but it would soon disappear with a bit of paint. My only reservation about the Baby Blender with this conversion is the bottom wing. To maintain strength, I think it would be better to cut a fitted recess in the fuselage rather than cutting slots in the top of the wing. For reasons of strength, this solid wing and shaped cut-out in the fuselage system is now my 'default' build method for all my planes.
For more info on the actual build system, refer to the detail in the Polikarpov article. I've still to adjust the BB drawing, but I've also arrived at a new 'default' for the saddles that link into the fuselage sides - the little cranked ends are now only 3-4mm long and catch on a length of BBQ skewer embedded in the fuselage sides.
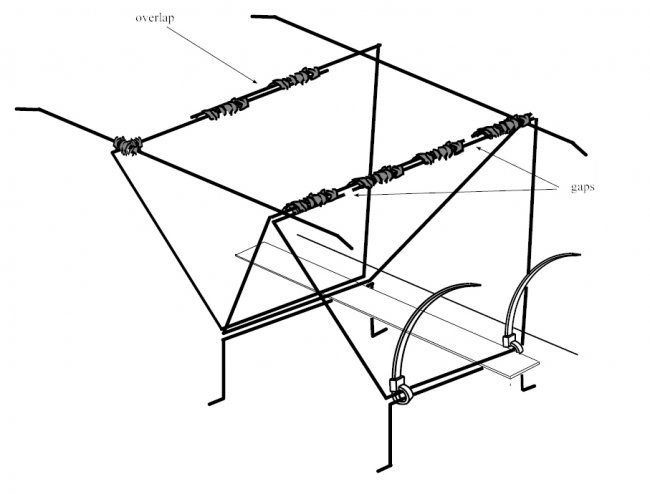
There's a 'good' way to bind up the wires, shown here at the top, and in the bending guide below. The wing is held down by elastics over the ends of the top bars. On my previous build (AVRO 539B) I glued a little plate to the underside of the wing that fitted neatly into that rectangular gap on the top.
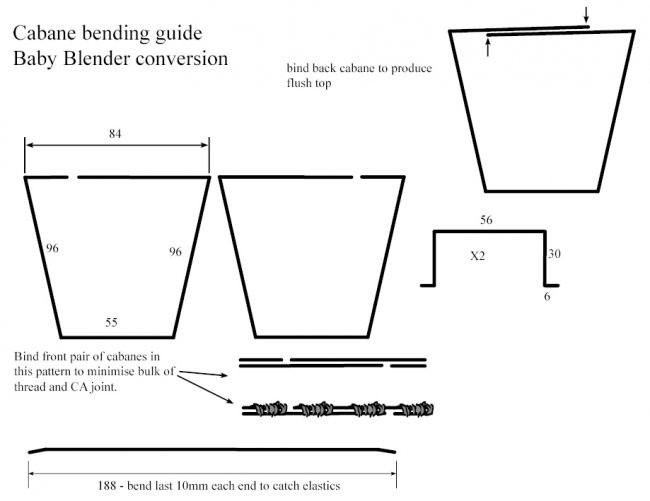
The music wire I have been using is 3/32" or 2.38mm or around 13 SWG... whichever you're familiar with. The illustrations shown here are not the final sizes - check the drawings for the final detail.
Here's a link to the PDF for the full size images; Baby Blender wire cabanes & interplane struts