Or… it's not over until the fat lady sits on your plane!
What do you do with a wrecked plane? This article is about the wonders of the hot glue gun, foam board and a little creativity.
It all began last Wednesday;
News Flash – Vintage 1927 Velie Monocoupe crashes by the Musselburgh Lagoons in Scotland.
Pilot error blamed!
Well… there I was practicing flat turns with the rudder and a bit of reverse aileron to counter the roll (kind-of the opposite to bank-and-yank, which is a bit confusing.) Well, it gusted - and the wings did a flutter - and then my mind went completely blank. Was it left or right with the ailerons? End result - an exceptional nose-dive and dirt-nap! As you can see I broke the back of the fuselage.
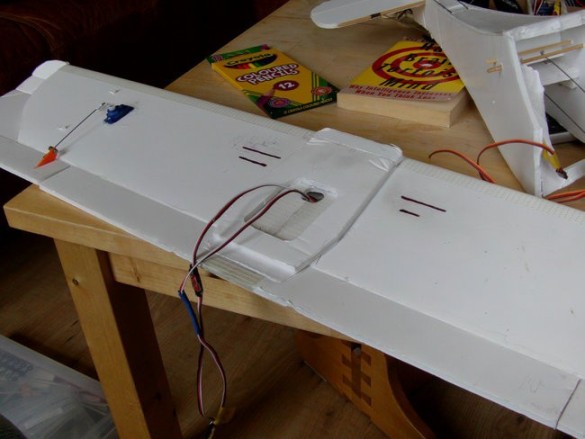
The tail survived without significant damage but the front was pretty crumpled. Another plus, the wing was intact with only a little deformation to the locating pad.
I considered my options;
- A complete rebuild of the fuselage.
- Replace sections of the fuselage – butt jointing them to the existing 'good' bits.
- Cobble it all back together with hot glue and lots of love.
Well, I thought, if I'm likely to crash it again then options 1 & 2 were a lot more effort - so I opted for option 3. It wouldn't produce the prettiest of results, but I would get the plane flying again. So here's how it went;
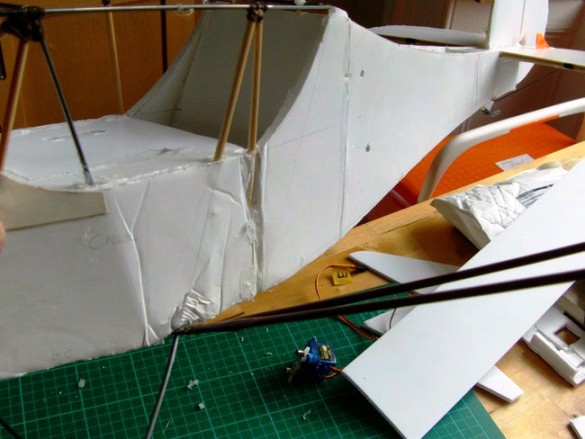
I completed the job started by the crash and cut the plane in half.
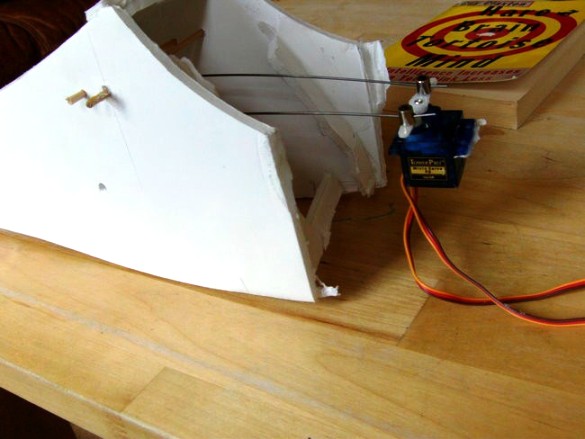
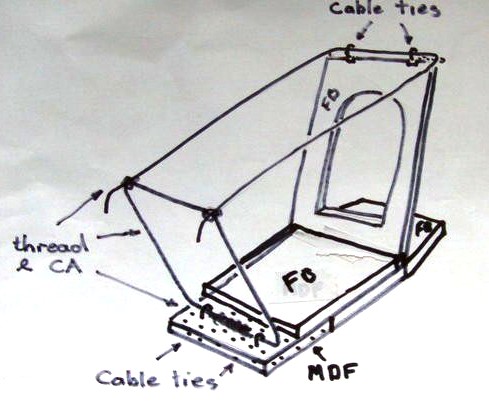
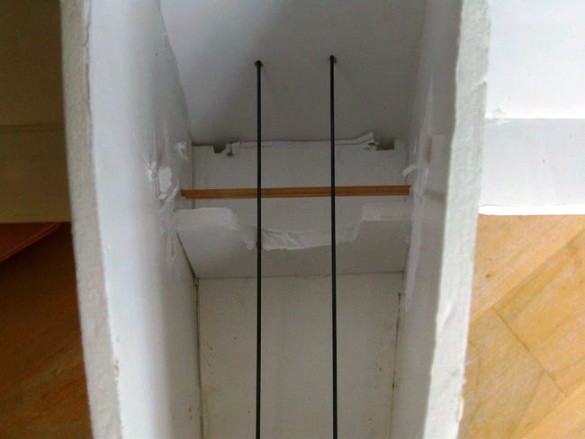
Inside the rear you can see the remains of a slanting bulkhead that ran up the back of the cabin space. The top of this ripped off and remained attached to the wire wing support. At least this was proof that the attachment method of bonding the wood skewer to the foam board, and then lashing the wire to the skewer was effective!
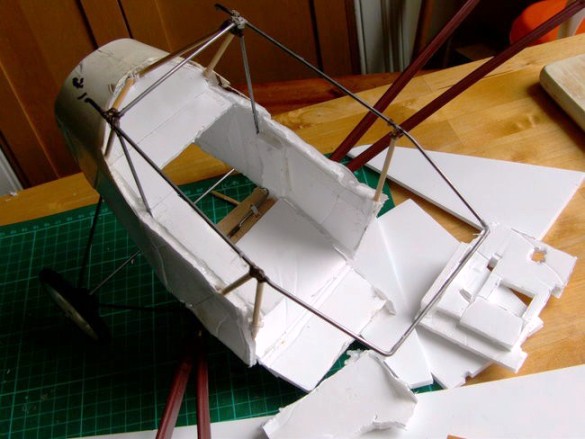
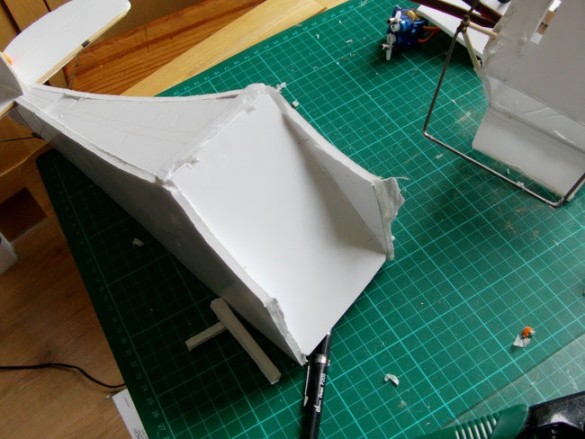
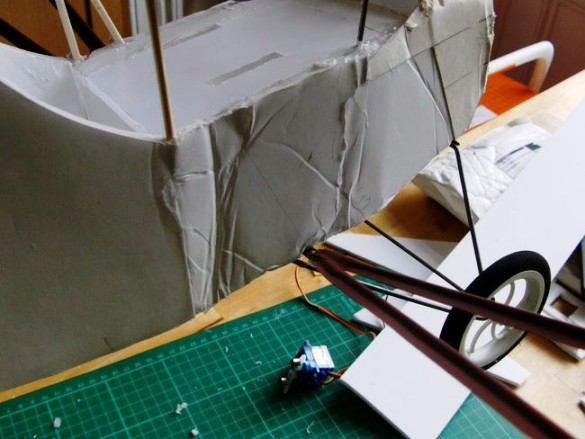
I put the back half aside and concentrated on the front. First, assess the damage. The foam board sides were pretty buckled but I reckoned once they were firmly attached to rigid cross members they would be stiff enough…
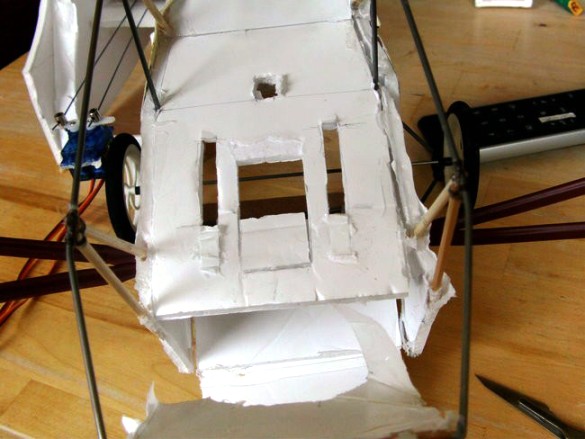
…the real strength at the front of the plane comes from the four elements shown in this drawing;
The wire top, the sloping wire up-stand, the MDF and foam board bottom plate and the foam board bulkhead at the back of the cabin space. The only part of this lopsided box that was really damaged was the foam board bulkhead, which would be simple to replace.
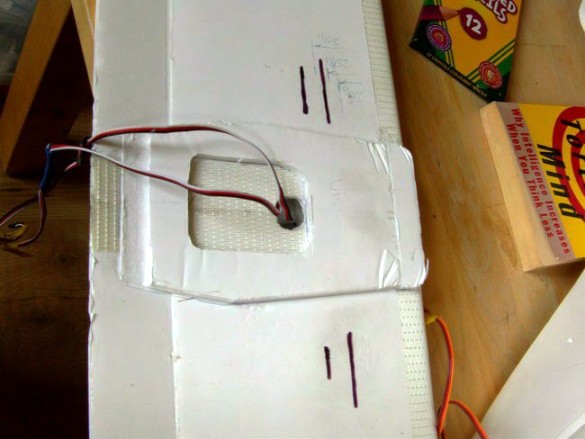
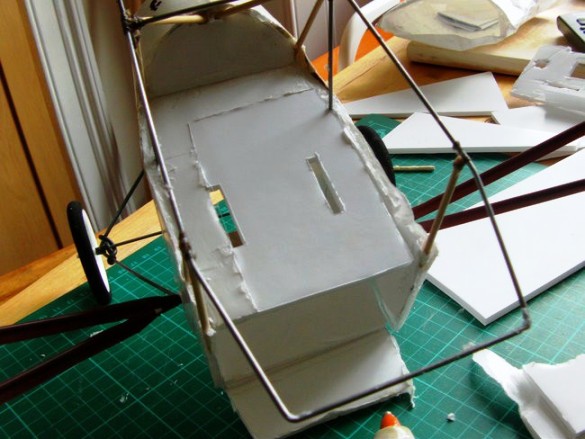
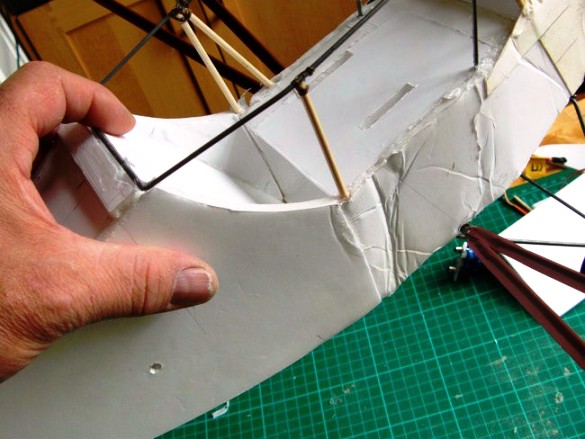
Looking inside the front you can see the wire wing support has broken away from the fuselage - ripping the pad that held it in place.
In addition the fuselage sides have sprung away from the MDF and foam board bottom plate, and from the servo tray.
I decided to replace the tray and take the opportunity to shift the servos forward. As the left hand side of this tray was still fixed to the side I knew it would be cleaner and easier to cut-away only a part of the tray.
I used the 'old bit' as a template and cut a new piece of foam to fit.
Before gluing it in place I turned my attention to the right side of the fuselage, which was coming apart.
Hot glue soon had this fixed.
Then the bottom left.
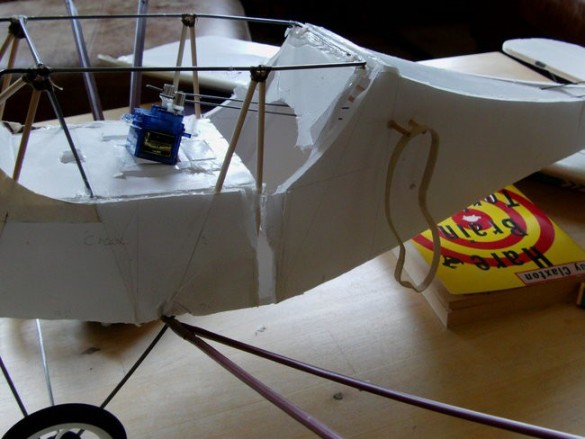
I then glued-in the replacement servo tray. A bit of a blobby join, but it was hard to hold it firmly and wipe away excess glue. I later trimmed the blobs with a scalpel. Note that I didn't glue the side, just concentrating on getting the new part in the right place first. I think this bit-by-bit approach is one of the keys to success.
After that it was fairly simple to glue the right fuselage side back to the servo tray and the base plate. The loose join between the wire and the fuselage side…
…was fixed by removing the loose half of the pad and then gluing it back into place.
At this stage I turned my attention to the back of the plane. I cut out a replacement bulkhead and fitted this in place. In the drawing and in earlier pictures you can see the original foam board plate had a cut-out to accommodate the swappable pod. As part of my efforts to reduce tail weight I'd already cut the swappable pod in half - eliminating the back lugs and the need for this cut-out, so the new bulkhead is just solid.
A test-fit shows the two halves lining up perfectly.
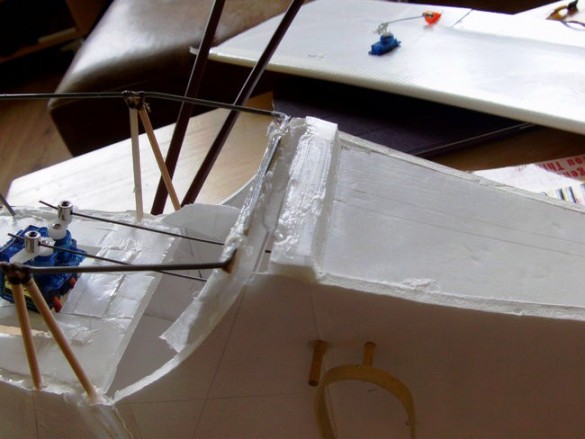
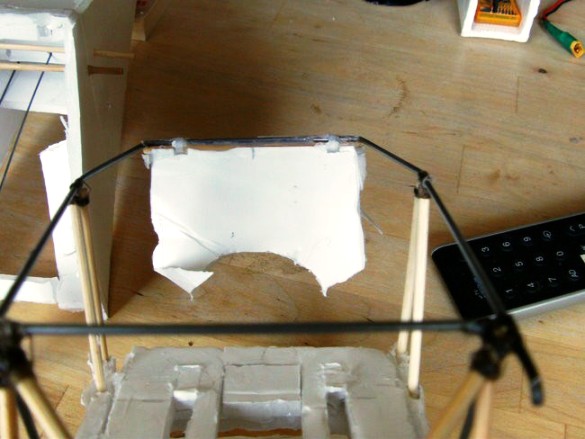
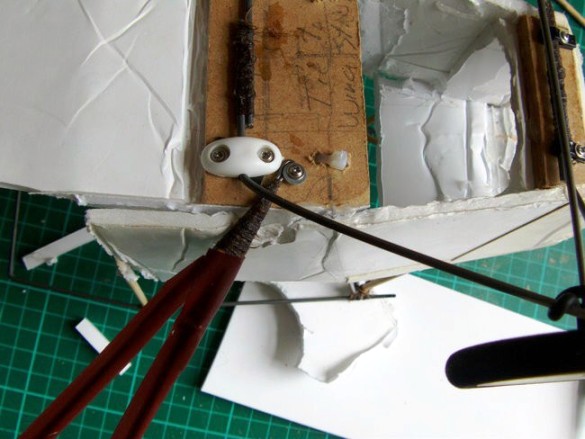
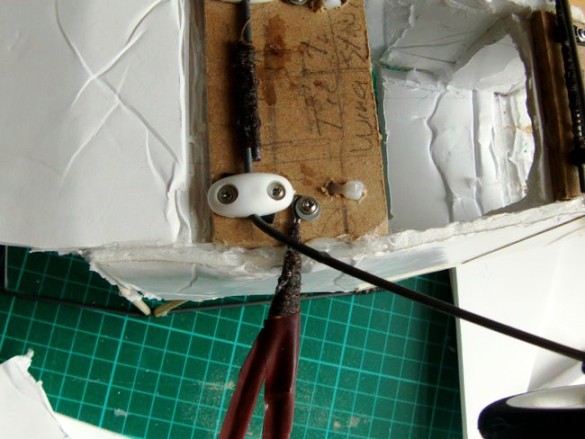
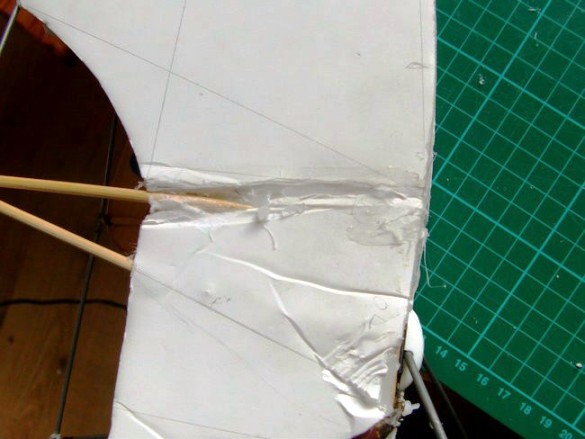
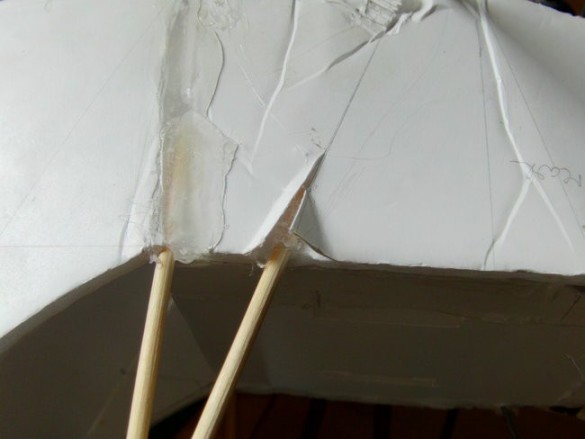
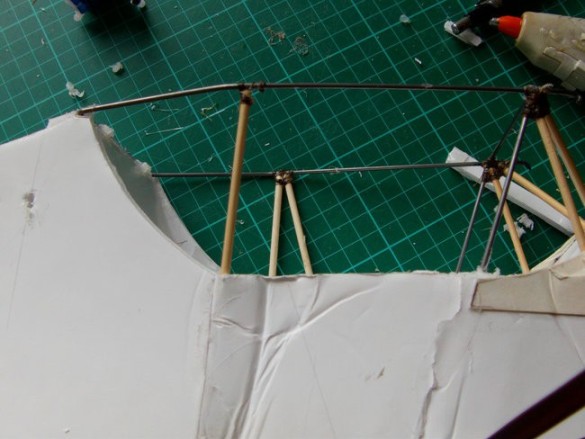
I prepared the top joint, cable-tying the skewer to the wire…
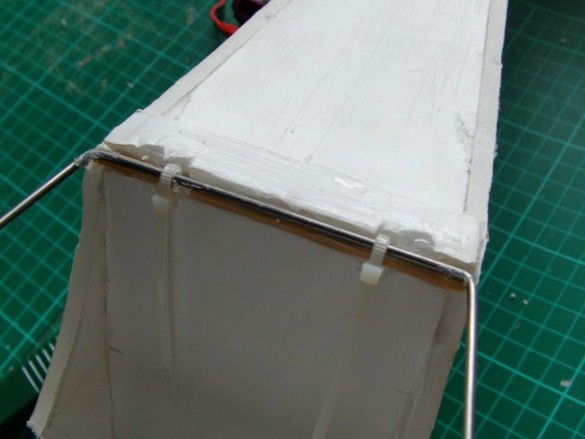
…and did a test fit and adjustment, making sure the skewer would bed properly into the foam.
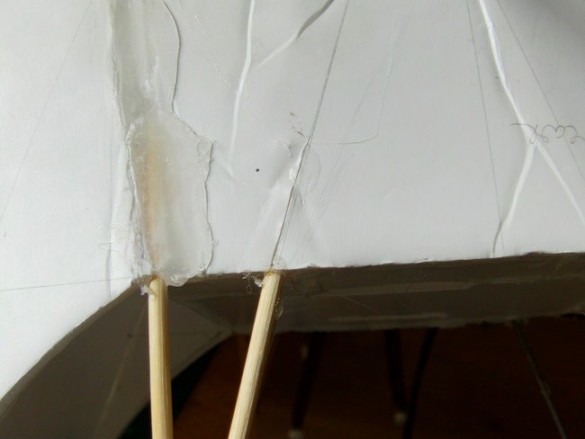
Just before joining, I stripped away the dodgy paper around the left side break. Further back along the rear of the fuselage you can see two repairs. These were pressure folds which might have been left, but I decided to fix them. I did this by carefully running a scalpel down the line of the fold. I then gently sprang the joint open and squeezed in some hot glue. I let the join spring closed and scraped away the excess glue. I feel this returns the foam board to at least its original strength.
I ran glue around all the mating surfaces and pressed the two halves together making sure they were correctly aligned. A 'long-hold' later, and the fuselage was almost a single piece again!

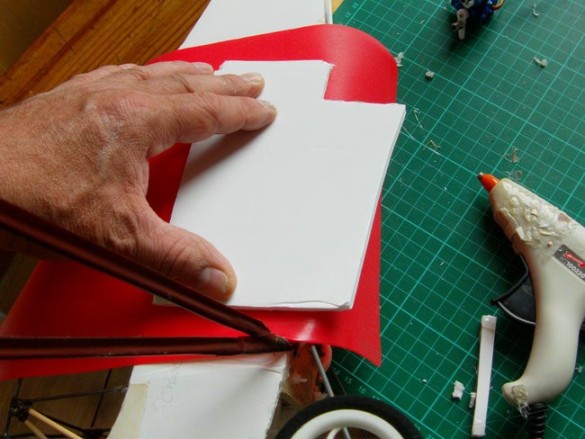
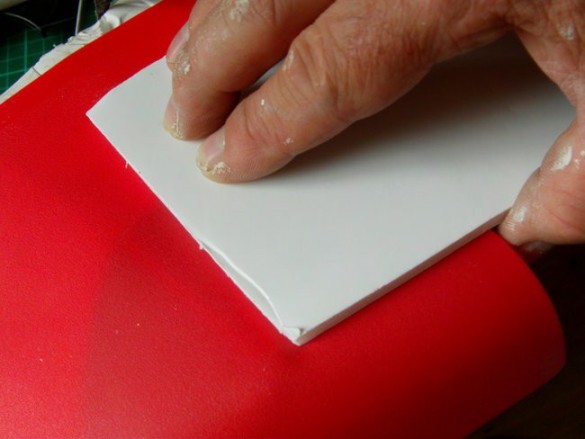
The last join was the overlapping foam board plate that bridges the break. You can see it better here, before…
…and then after.
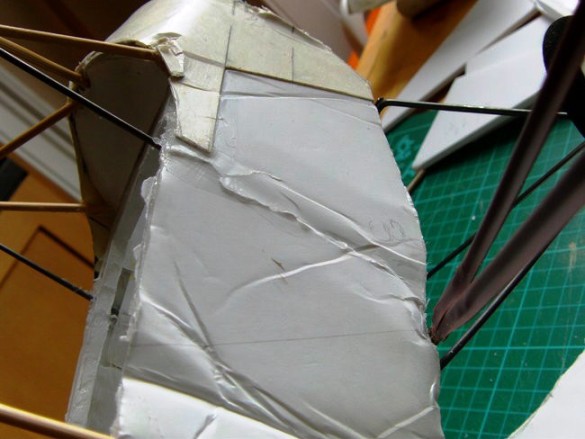
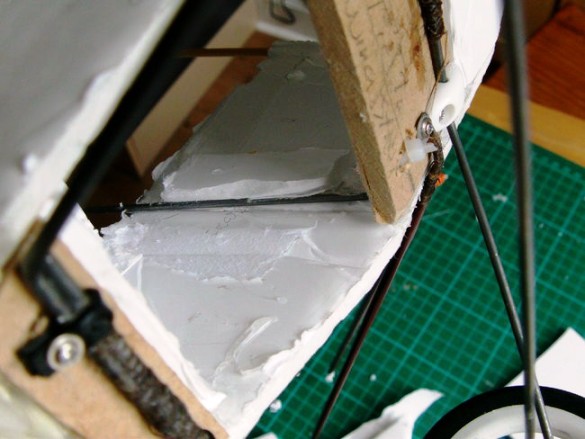
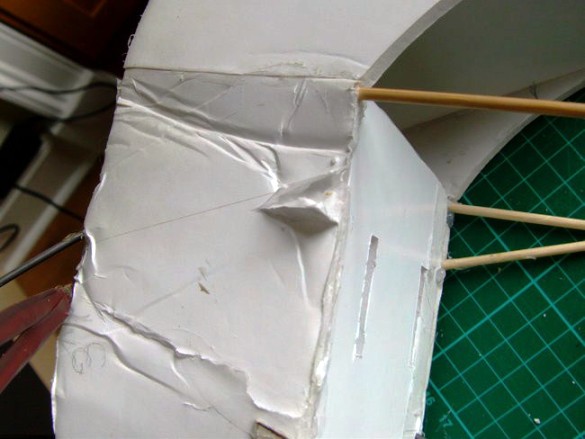
Now to tidy up some of the joins. First the left side where I stripped off the paper and loose crumpled foam.
I put sufficient glue into the void, laid a sheet of baking silicone over the join and pressed it down with a spare piece of foam board. The silicone doesn't stick to the glue, and leaves a smooth(ish) finish.

If I hadn't been fiddling about talking pictures I would have got the glue when it was a bit hotter and the join would have been flatter. But it's an indicator of what's possible using this method.
The adjacent skewer frame on this side was a little loose, so I split the paper and opened it up.
A repeat of the silicone sheet system produced a nice repair.
The identical member on the opposite side of the cabin had come loose from the wire and the fuselage.
This was fixed with another cut…
…and a silicone sheet repair. Again, not so neat due to fiddling with cameras etc, but it's a strong join.
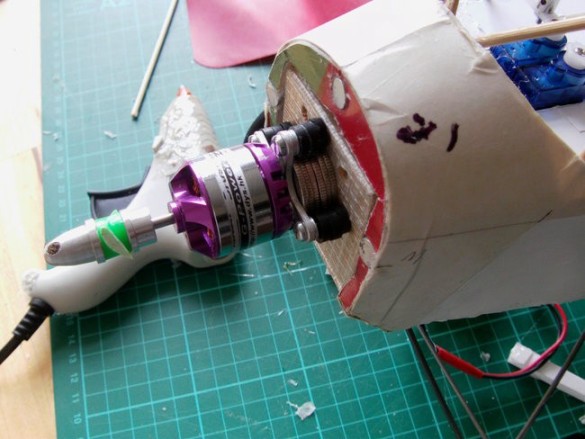
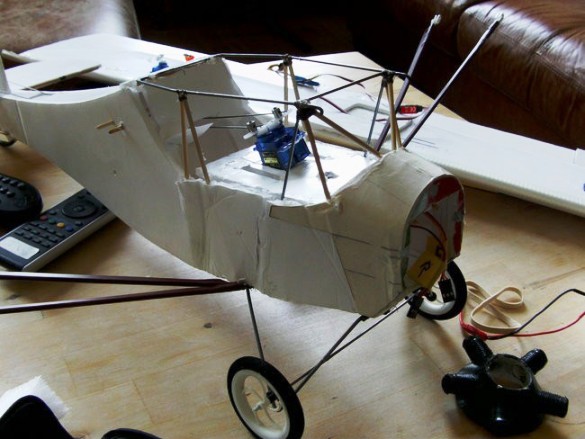
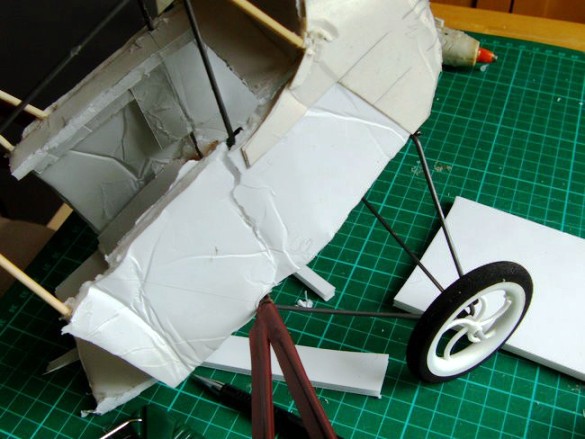
So a quick test fit of the pod shows things are looking promising – note the extra nose weight coins tucked-in behind the motor and, to my shame, the broken prop that hasn't been replaced yet.
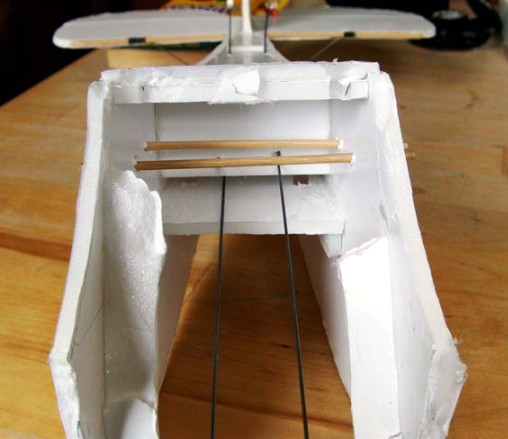
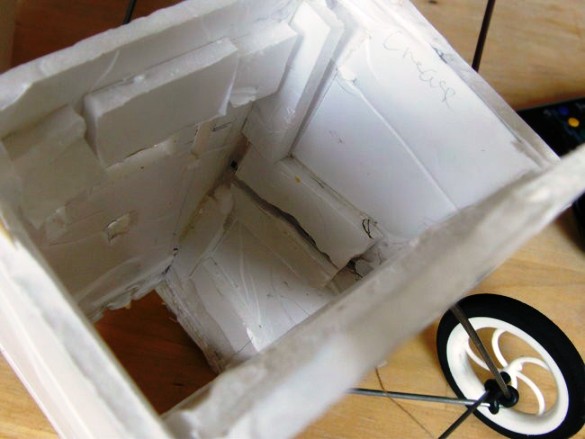
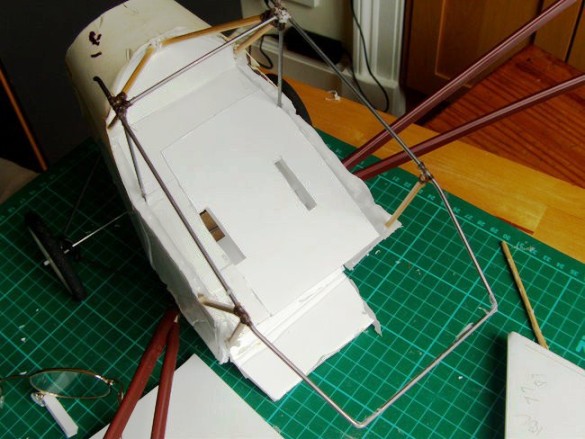
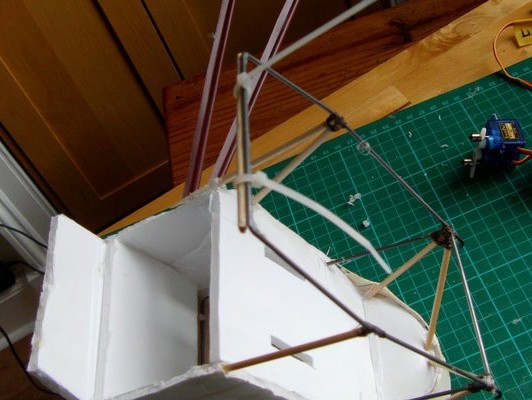
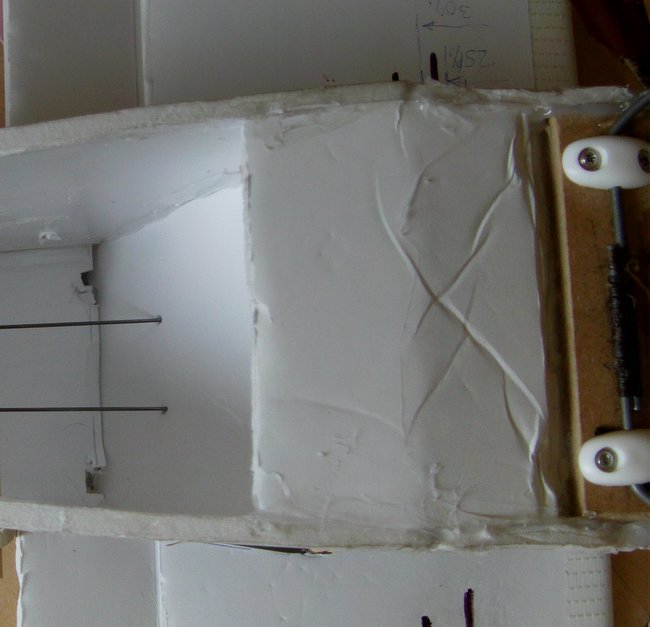
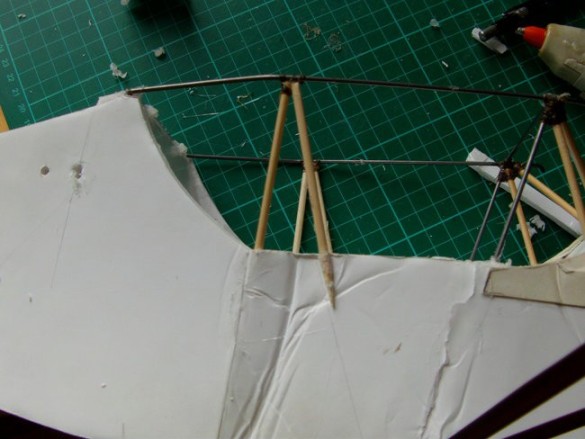
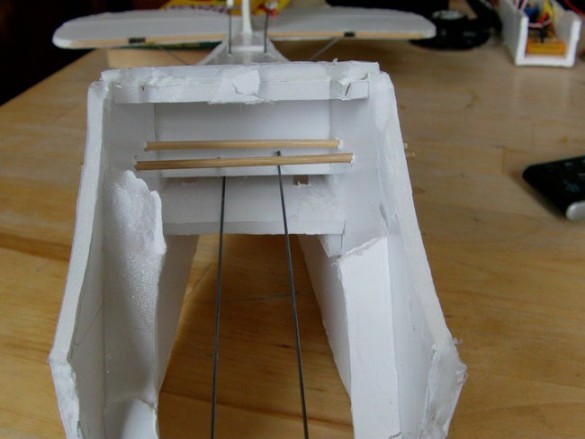
I re-mounted the servos as far forward as I could. ( I later extended the control rods by binding extra wire to the ends with thread and CA glue.) At the back of the cabin you can see the wire wing support firmly bedded-in to the new bulkhead, and the control rods poked-through the bulkhead.
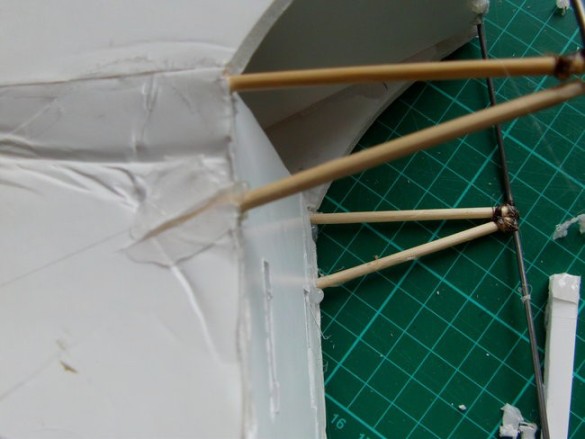
I removed the redundant support in the tail for the 'long pod'. See it here just below the skewers…
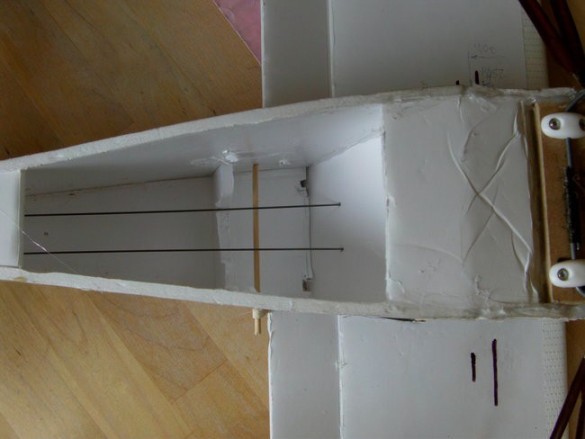
…and now removed.
I also tidied the little cross-brace, giving clearance to the control rods, and removed the redundant skewer that held the wing before I moved it back.
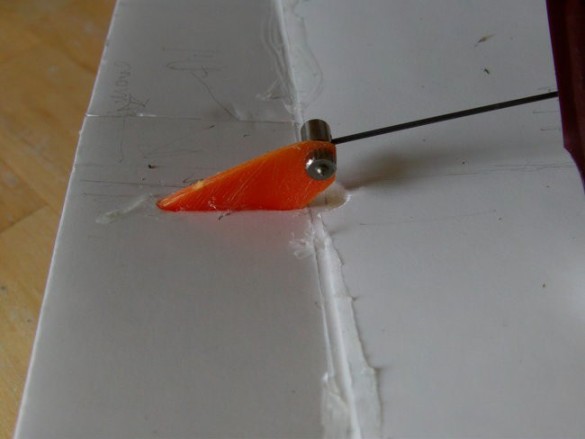
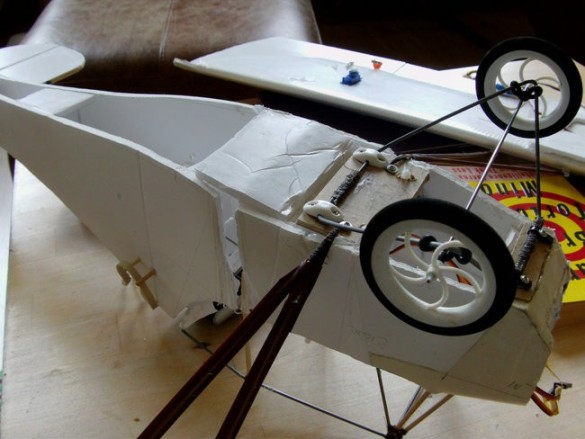
You might have noticed the colourful control horns – I'm recycling old broken props, which I seem to have a lot of.
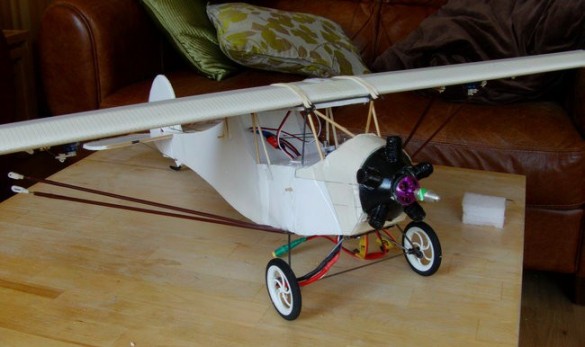
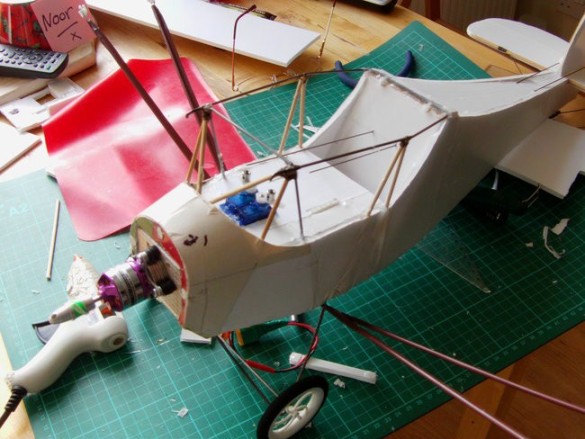
Almost there, and a quick assembly to see how things are looking. Here, it might help if you borrow my rose-tinted specs – and yes, it's looking pretty much the way it should. All the control surfaces are intact and properly aligned, and there's no twisting or kinking of the fuselage - which is always a bonus! OK there's the odd ripple, but who bothers about those.
Overall I'm pretty pleased to have rescued this plane – this foam board and hot glue lark is great.
After checking the balance, I found I was able to remove one of those coins at the front. I'm hoping to remove at least one more as I fine tune the balance. When I refitted the pod I made an adjustment to the engine mount and the pod to create more downthrust, which I think has also been an issue. Now I just need a break in the weather to get this ugly-duckling up in the air again. I hope this article inspires others to repair rather than scrap. All the best, Alibopo.
Here's a video of the Monocoupe flying; before and after the crash;