Alistair Potter's RC plane tips.
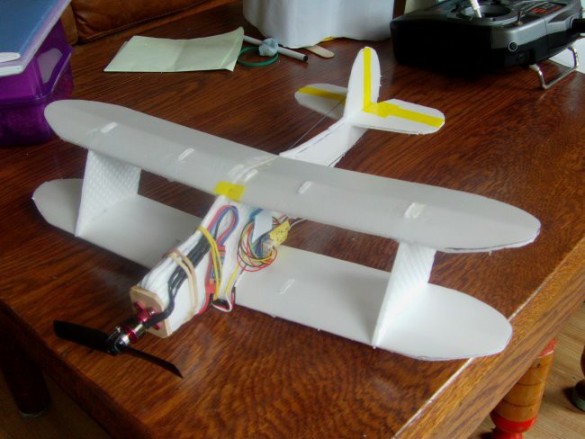
A Beechcraft Staggerwing from frozen pizza packaging!
Back to planes list. Back to homepage.
Wingspan – 38 cm 15 inches.
Length – 600mm 23.5 inches.
AUW – 75g 2.65ozs.
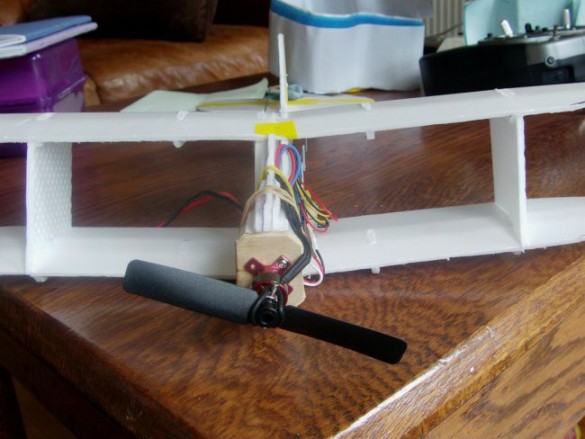
Drive – Turnigy 1400 4500Kv motor with a 4 x 2.5 prop.
Battery – 250mah 2S LiPo batteries, which give a flight time of roughly 6 minutes.
ESC – HobbyKing 6A0.5A UBEC
Servos – HobbyKing 2.5g .17kg .12sec Micro Servos (Changed to micro molex connectors.)
Reciever – OrangeRx R415 Spektrum DSM2 Compatible 4Ch Micro 2.4Ghz Receiver
Adhesive used throughout was foam–safe CA and kicker.
This plane is made from the foam 'plate' found under the pizza in frozen pizza boxes. It's about 3–4mm thick. The plane is built using Flying Penguin RC's Staggerwing Flat Shot plans printed out at 37%. This fitted the longest components onto an A4 sheet, which is the common office paper size in the UK. I believe the US uses 'Letter' size paper which is very slightly different so I'm not sure if it will fit at that exact scale.
After printing the plans I made a couple of design decisions and modifications, which I sketched onto the paper before cutting it out.
I ignored all the fuselage cut–outs, and decided to only laminate up the centre 3 layers and omit the two side panels. I kept the rudder and horizontal stabiliser assembly detail, as that seemed a good way fit the tail assembly.
I adjusted the wing chord, making it about 10mm larger, to give me a little more lift. This influenced the fold lines for the front of the wing, bringing the fold strips that make up the wing 'curve' to roughly 10mm each. I you don't mind 'cartooning' the plane, I think the wings could take another 10–15 mm increase in chord giving a slower flying model.
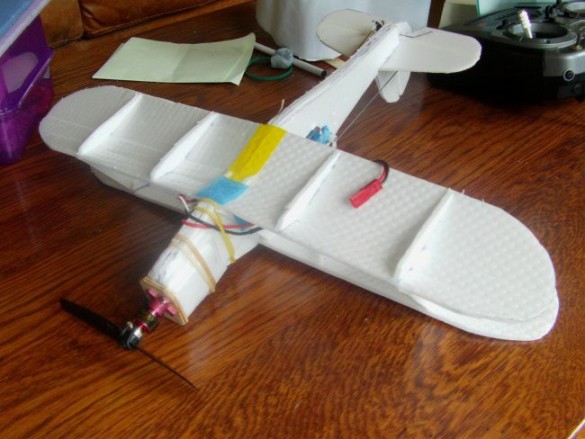
I made the aerofoil shaper ribs all the same. I didn't intend feeding the wing through the fuselage, so having them consistently a little larger and stronger seemed the best idea. The ones on Flying Penguin RC's bottom wing are flatter, to allow the wing to fit through the fuselage slot. At the back there you can see a thin piano wire 'saddle' connecting the two sides of the elevator.
I added about 8mm to the elevator to give it a bit more authority, but left the rudder the same size. I ignored the balanced rudder detail as it's too fiddly at this scale.

I used the basic dimensions for the wing separators, but modified these to a large solid panel. Cut to the 'correct' shape, these would have almost zero strength in this material.
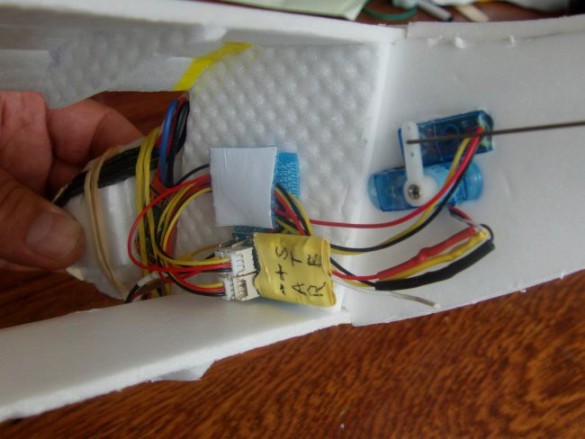
I made two extra panels, which I fitted alongside the fuselage to offer greater stability and strength for the wing mounting. The servos are just 'push fitted' in the foam – one from each side.
After folding and assembling the four wing panels, I paired them up and made them into matching dihedral units. The plane has no ailerons, so I needed the dihedral to help stabilise it.
I found that for bevels etc. it was much easier just to compress the foam rather than try and cut it. A light rub with the edge of a fingernail was enough shaping to create the dihedral join! The rudder and elevator hinges were bevelled with the same technique.
I test 'fitted' the wings to the fuselage, carefully adjusting the wing cut–out on the top of the fuselage for the larger wing chord. Underneath I cut through the fuselage bottom to remove the slot detail and again adjusted the 'bedding' of the larger wing.
Once it was all fitting neatly I glued the bottom wing first, then attached the two wing spacers against the fuselage, making sure the bottom wing remained correctly aligned. I then fitted the two outer spacers to the bottom wing, finally I set the top wing onto the four spacers and the single strip of fuselage at the top. I used the original tab system throughout to help locate the wing formers and spacers. It set–up quite nicely and seems rigid enough.
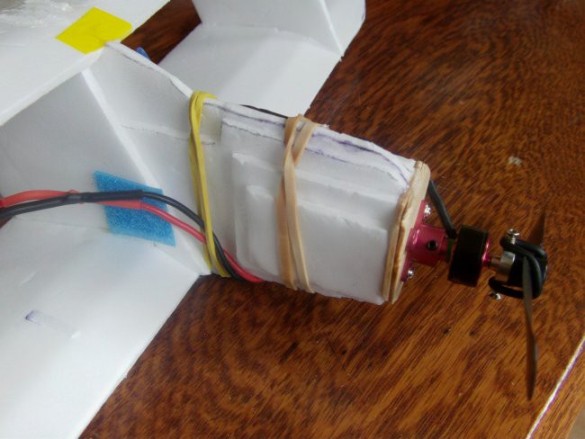
The firewall is a cross–lamination of tongue depressors! I added two additional foam packers either side of the nose, to increase the width of the nose for a good contact with the firewall.
Here's the maiden. I flew quite fast at the start and only began easing–off near the end of the flight (2:50). The plane is pretty stable in flight and loops with ease. I had a messy attempt at roll and ended up going back the way I came. I'll need to think–through my control input sequence before I try it again, but with practice it should be possible.